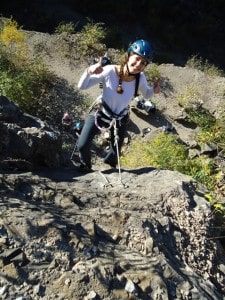
Taking a fall can be very intimidating, and it is best to practice on a steep, overhanging wall, when 5 or 6 clips up, where you can just fall into space. Often when a climber gets into difficulty, she either down climbs and sits on the rope, or asks for a tight rope, then drops off.
Taking in too tight is probably the worst thing the belayer can do as he is taking all the give out of the system, and the climber will have an unpleasant experience – slamming into the wall, which will put her off falling even more. You also see climbers struggling to clip high above their heads, which will result in a huge fall should they slip. Sport climbs are often ‘designed’ with a clipping hold to hand, so it may be better to push on closer to the clip and the clipping hold, and then should you slip the fall will be much shorter. However, the ‘clipping hold’ may not always be there, but the clue will be in the grade.
The belayer should always be vigilant. It is easy to be distracted, particularly at a busy climbing centre, and you never know when the climber will fall. A hold could spin, a hold could break off – a good reason to wear a helmet when belaying outdoors, so it is essential to be ready to hold a fall, you could save the climbers life. All too often you see even very experienced climbers belaying in a casual way, too much slack in the system, slipping the hand up the dead rope; the problem is just because nothing has ever happened doesn’t mean it won’t today.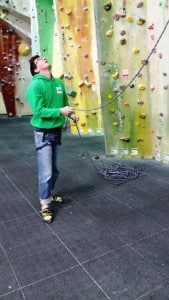
When the climber falls off unexpectedly, the belayer will probably move inwards and upwards and the best thing to do is go with it and DON’T LET GO. This is all part of the dynamics of the system. Some instructors advocate the use of a weight bag or if outside anchoring the belayer, particularly if there is a weight difference, but this stops active belaying and restricts the give in the system should the climber fall.
The Gri Gri is an excellent sport climbing belay device, but a lot of climbers don’t like it because if it is not used with anticipation and active belaying, it will be jerky to pay out to the climber. With practice, using the manufacturers’ instructions or from guidance from a qualified instructor it is very safe to use. It is essential that there is communication and co-operation between the lead climber and the lead belayer.
There is a negative side to the Gri Gri and that is when the lead climber falls off, the device automatically locks, which takes some of the dynamics out of the system. Its locking action has led some climbers to believe it is a hands free device. This is not the case. It should be used in a similar fashion to a standard belay device, with one hand always on the dead rope, and taking in using the bottom rope technique.
The Lower Off
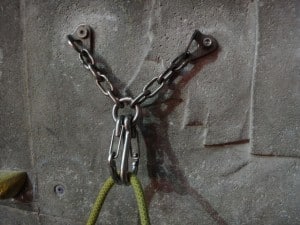
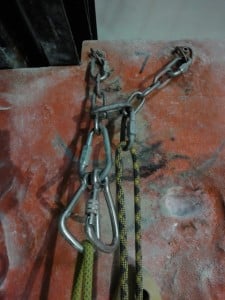
Once you reach the top of your sport climb, you have to clip into the belay before you are lowered off, and this differs inside and outside. Indoors you are generally faced with two bolts, linked together by a chain, with either two opposing snap link karabiners or a snap link and a screwgate karabiner. If, once you have led it, you are either going to strip the quickdraws or your belayer is going to follow the climb, you must clip into both karabiners AND close the screwgate. If the belayer is also going to lead it, you need only clip one of the snap links as you will still be protected by all the quickdraws as you are lowered. Once you have clipped in, you must communicate with your belayer so he can take in before lowering you. If it is particularly busy you may want a visual signal as well, as your voices may not be heard.
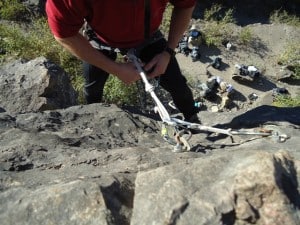
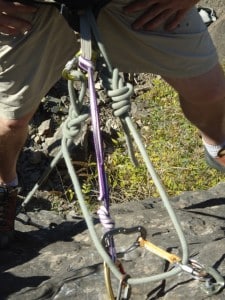
Outdoors, you may come across the same system, but is is unlikely and there are a variety of systems even on the same cliff. The following belt and braces system you could use on any sport crag in the world, but as you grow in experience you will make your own judgements at lower offs and use subtle differences.
- As you set off to lead climb have a sling attached to your belay loop using a larks foot and clipped to a gear loop via a screwgate karabiner.
- As you arrive at the lower off, clip the screwgate into one of the bolt hangars if it is an expansion bolt or the bolt eye if it is a resined bolt, underneath any metalwork e.g. maillons, steel rings or chain.
- Clip a quickdraw into the second bolt hangar and clip it into the sling you have just

Rope threaded through lower off attached to the first bolt hangar.
- Take enough slack to be able to thread the belay, tie a figure of 8 knot on a bight and clip to your belay loop using a screwgate karabiner. If the lower off fails at this point you are still protected by all the quickdraws below you as you are still on belay.
- Untie your original knot, thread through the appropriate metalwork; maillons, steel rings at the end of the chain, the end of the chain itself, or the resined eye of the bolt!!!! and tie in again as normal.
- You can now take off and untie the figure of 8 on a bight attached to your belay loop and ask your belayer to take in the slack.

Being lowered off
Once you feel the rope tight on your harness, check it is threaded through the belay and that you have tied in correctly, remove the quickdraw and sling and communicate with your belayer that you wish to be lowered.
