
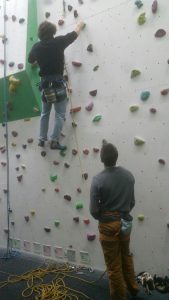
The safest way to learn to lead climb is to mock lead. Mock leading is best done with 3 people; one to lead climb, tied into both a lead rope and a top rope, one to lead belay and one to top rope belay – keeping the lead climber safe as he/she practises clipping without the fear of falling off. This method also gives an excellent opportunity for the lead belayer to practise without putting the lead climber at risk.
Lead climbing is one of the most difficult skills to get right, and not many climbers are taught by an experienced or qualified instructor, so you will often see at climbing centres and at the crag ‘experienced’ climbers demonstrating poor technique. When you do get lead belaying right the lead climber is well rewarded because if they do slip, or a hold breaks off or a resin hold spins you could save them from serious injury and even death. As the climbers confidence in the lead belayer grows the lead climber will become more confident in their own ability and will concentrate purely on the climbing. What a lot of climbers don’t realise is the potential to hit the floor from 3 and even 4 clips up, particularly if the lead climber is clipping high. When Ali Taylor teaches lead climbing she does a practical demonstration which has a big impact and beneficial effect on the clients learning to lead belay as it shows the potential for the lead climber to be hurt.
Before the lead climber leaves the floor, she must decide which side she wants the belayer to stand, so the least amount of rope is paid out and the rope doesn’t cross the body. If the clips are mainly on the right of the climb then the belayer must stand to the right.
The lead belayer has a very difficult job as the lead climber leaves the floor as he has to:
- allow enough slack rope for the first clip.
- stand close enough to spot should the lead climber slip and
- be ready to begin belaying as soon as the first clip is accomplished having moved into a position close to the wall, but slightly to the side to be able to see inside the climber.
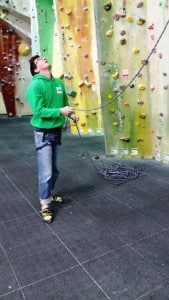
Belay technique at 1st clip
It is essential that any extra slack is taken in at this time to prevent a ground fall, but not too much that it prevents upward movement.
The 2nd clip is perhaps the most dangerous in its potential for a ground fall and the belayer has to use a great deal of judgement which only comes with practise and experience. The belayer should stay close into the wall until the 4th clip is made to prevent a ground fall and once this is clipped the belayer can begin to move back and the belaying to become more active.
The belayer needs to keep enough slack in the rope to enable the lead climber to move freely, and when they clip, the belayer should anticipate this so there is no tugging on the rope.
 A tight rope could pull the lead climber off, but also if the climber falls and the rope is too tight they are likely to slam into the wall in an arc and hurt themselves, whilst a slack rope gives more stretch in the system and the fall, though further, will be more comfortable as you fall down into space.
Active belaying allows more fluid belaying as you step in towards the climber as you pay out and step back as you take in. It is important when you do take in, that you keep your hand on the dead rope at all times by going back to bottom rope belaying – V to the knee, 1, 2, 3. If you skip, or slide your hand up the dead rope at this point and the climber falls off, the chances of you holding the fall are slim.